Archive for the ‘Rantings and Ravings’ Category

Update on costs

Friday, November 30th, 2012

I’ve spent the past week negotiating on pricing for the off grid power system. I’ve picked up 2.5kW of 24V solar panels from Low Energy Developments in Melbourne for a very nice price.

Coleman Air based in the USA are sending out all of the electrical control gear to run the panels as well as allow input of wind turbines. Components with the capability of this gear are not available in Australia as the renewables sector has been unfairly skewed to solar, where the ridiculous incentives and rebates were offered.

One example of the capability of the Coleman Air equipment is their charge controller. It will take any mix of power input (of the same DC voltage) to a total of 10kW, charge the batteries to optimum capacity then dump the excess power generated to just about anything I like. Try and find a controller here that comes even close to the capacity alone and you’ll be pulling hair in no time. Since his gear is so damn cheap I’ve ordered everything but the copper wire to get the system running.

Once we have sourced the wind turbines I anticipate we’ll have a 4.5kW system leaving plenty of reserve should we need more panels or turbines in the future to meet power requirements. Ideally I would like to have enough capability so we are not needing to use a genset to charge the batteries.

Since all the pricing of this gear was more than acceptable I have also grabbed 2kW of panels and all the control gear for the aquaponics shed as well.

I still need to source wind turbines, batteries and an inverter for the house system plus purchase the steel to make the mounting racks for the solar panels and the copper to wire it all together. I’m anticipating this to run another $14k which will give us a functioning system for less than connecting power to the house.

And as a bonus to all that there will be no more f#*%ing power bills.

By the way, do you enjoy paying through the nose for your power? Blame the neighbours with the 5kW grid feed systems getting 60 cents a kW for feed in. Then blame the government who forces power companies to buy that power being fed in as part of their renewables targets. Can you see where the unreasonable power price increases have come from?

Ironically since those incentives have collapsed solar panels are now reasonably priced.

So, on to the figures:
Low Energy Developments for the panels, freight and insurance – $2375 (house only)
Coleman Air for charge controller, rectifiers, ammeter/voltmeter, switches, breakers and blocking diodes – $1781.53 (house only)
Bunnings for primer/sealer/bonder – $271
United Fasteners for fixings for the windows – $167.27

Total project spend is now at $306,085.78
House only is now $92,133.28
Cost per square metre is now $319.91

Some numbers

Thursday, February 23rd, 2012

Being 38C today gives me an opportunity to sit in aircon comfort and crunch a few numbers.

Blocks poured to date – 467.42
Bags of cement used – 213.5
Blocks per bag – 2.19
Cement cost per block – $3.84
Sand cost per block – $1.55
Blocks per square metre – 5.55
Wall cost per square metre – $29.91

Cubic metres poured – 23.69
Guesstimated cubic metres wasted mix – 3
We are getting better at managing the wasted mix but it is not completely avoidable.

The joys of children

Sunday, February 20th, 2011

Little fella started back at playgroup last week so the first cold of the season has laid me up for the past 5 days and I am feeling like I need another 2 at least to beat this bug. It’s been a good time to sit and ponder on where things are with the build. I’ve given us a general tick for everything being where it needs to be, although I would have liked the power room to have been finished already.

Still, lots of learning has been done, lots of modifications have been made and the future looks simplified shall we say.

Our next pour day will be the other side of the power room first level blocks where the lessons learned from the first blocks will be used to hopefully give the desired finish. If this comes out as we want then the whole build will be ramped up and we’ll be going for broke.

The power room is using only a third of the shuttering I have made so I could, time permitting, start on the smaller portions of the house while finishing off the power room. Wishful thinking maybe? Probably, but I’ve lost the opportunity to get 70 or so blocks done while I have been sick. I am going to take every opportunity from here on in to get an extra block in whenever I can. With 960 odd to make, sneaking an extra 1,2 or 3 in a day will make a significant difference to how long the whole wall making process is likely to take.

Makin’ stuff and stuffing around

Saturday, December 11th, 2010

I’ve just about chewed through 5 kg of welding rods in finishing off various bits and pieces of the mould system and ancillary inventions. My dad is coming over next week to give me a hand with trimming up all the formply so I can bolt together the shutters and various custom corners to finish the mould system. Once these are done the very final bit of welding needs to be done to the dividers and that is adding the top locator bolts.

I must say I am very happy with how the system has come together, when you check out the very first idea I had for the dividers
Mold Divider Details
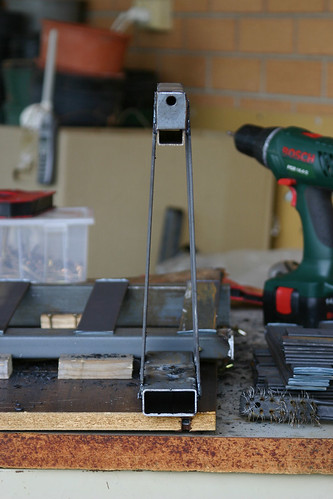
then compare that to the end result
Near perfect alignment
you can see how much lighter they will be for a start with about a third of the steel needed. The lighter design did need a lot more thought put into it to ensure some accuracy across all the pieces. The final design will have a thin sheet of oiled MDF placed either side and that will allow easy removal of the divider from the set blocks with the MDF then being gently peeled off the set face of the block, re oiled and then set again for the next run of blocks.

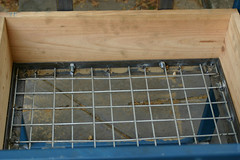
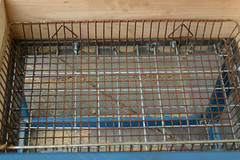
I put together a 2 stage soil sifter as well. We can sift down to 20mm aggregate by adding a removable mesh cage. This will be good for the walls and should give a nice smooth and uniform finish. The larger mesh filters down to 50mm, and that larger aggregate will be used in the retaining walls around the place.

Soil sifterSoil sifterSoil sifter

The stuffing around bit is in the soil tests we are conducting to work out the additives we need for the soil. So far I’ve done a couple of “shake tests” to seperate the soil particles into solids, sand, silt and clay and it looks like the soil is around 15% clay. I’ll run 2 earthen concrete shrinkage tests over the next week with soil as is and the soil cut back with 10% sharp sand by volume, both with 10% white cement as stabiliser.

Metrics, measuring other indicators and blah blah blah

Saturday, December 4th, 2010

I like numbers. I like being able to define something in a meaningful dollar value to compare my efforts to commercial/professional results. I’m going to start adding a component to the project costs which measures the cost of our house per square metre right up until it is finished.

Internally “finished” will include the basic livablility items such as bathrooms, laundry and a functional kitchen but exclude items where personal taste can blow the budget – kitchen cabinetry and appliances, floor tiles, carpets, curtains, taps and light fittings for example.

Externally I will include the earthworks, verandahs, pergola, water tanks, hot water system, power system and pre-slab plumbing in the cost per square metre as these are all integral to the livability of the house. I will not include the physical footprint of the pergolas or verandahs in that calculation since they are almost equal to the size of the house itself.

As of right now, the cost of our house per square metre (at 288 square metres) is $205.04  If I include the verandahs and pergola (total of 506 square metres) that would skew the figure to $116.67 which is not representative of the cost of the house.

Build schedule

Saturday, December 4th, 2010

If I put this in writing then I have something to stick to……

I put my business into a halt a few months back after realising I cannot devote the proper time to it to make the money to build the house while building the house. I have since found work driving trucks on an afternoon shift run which guarantees money with fixed hours. The hours are favourable enough for me to drop in home, pick up an esky with some supplies and head out to the block to sleep. I should be able to get 5-6 hours work in before having to head back home, grab some lunch, clean up and head back to work. Weekends I’ll simply camp on the block and head back home Monday morning for work.

I have made some modifications to the old truck, ripping out the rear seats and forming a flat platform large enough for an airbed for one with considerable tool storage underneath. The tandem is also getting some mods done to be able to chain and lock larger tools (generator, mixer, formwork and so on) I don’t want to be bringing back and forth each day and this will be left on the property, chained to a very large concrete block.

The Walls
We are planning to start the actual house in the days following Christmas. Our plan is to have it weather tight by August. We have 920 blocks to make with formwork already made to pour 16 blocks in the 5-6 hours per day. I’ll allow myself 3 months to get the walls done.

The Windows
All the windows are being made by us from recycled hardwood from the species required for our bushfire zone. Iron bark and redgum are some of the acceptable timbers we can choose from. These won’t take long to make since I can set up a couple of router tables I bought in preparation for this and simply spend a day machining and cutting wood. The frames will be installed unglazed and I will pay a glazier to fix the glass once they are in place.

Having done this volume of work with recycled wood when building the kitchen in the last house we owned I know it will take around 7 days to machine, cut and assemble the 14 windows, 2 sets of french doors and the front door and side light.

The windows and doors will be deliberately rustic in nature with lots of wooden dowels being used and left visible for some interest. They should look right at home next to the mud walls.

The Roof
Footersville and Lysaght will be contacted for a firm delivery date once I have a clear picture of a finishing date for the walls. The walls will need 4 weeks to cure properly before we can load them so there will be a heck of a mess of bracing in and around the site until the trusses and wall frames are in place to take the bracing loads.

Our biggest challenge with the roof will be weather, the calm periods around our site are rare and short lived and it could take days or months to fit the roofing iron dependent entirely on the wind.

So we have around 4 months of work to get done over 8 months. It should be achievable and the date is firm as one of us is celebrating a milestone birthday and we’d like to have it in our own home.

Perfect weather for curing concrete

Sunday, November 28th, 2010

I was on the block over the weekend getting some labouring work done for the plumber. The slab looks great and we’ve been so lucky with the weather with mainly overcast days and a fair amount of rain spread across the day. Here’s hoping those curing conditions give us the strongest slab possible.

The plumber has been hard at it connecting the drains to the underfloor plumbing. The amount of fall by the time he’s wrapped the pipe around the slab and started heading it out to the septic tank is around 1.8 metres. That’s some major site excavations. With some dumb luck he has not found any huge lumps of rock, instead being able to bash his way through with a jackhammer. That works out cheaper for us than a rock breaking excavator for sure but will still blow out his bill somewhat.

Never mind though, we’d had visions of being $10 000 poorer after the site cut revealed those huge lumps of rock so the $3000 or so bill resulting from that is a more pleasant result.

Paperwork has been lodged!

Wednesday, August 25th, 2010

I can hardly believe it myself. I picked up the completed certification documents from Tany at Pocius and Associates yesterday morning and drove straight out to Cambrai to lodge them with the building consents officers at the council.

The officer explained how the process unfolds from here, and it is simply they check the planning approval against the final plans to make sure we are not completely turning the design on its head. By law they have 5 days now to stamp the documents with the big “approved” stamp and return them to us.

To get to here we have needed help from some really dedicated people and would like to issue thanks to the following:
Aaron, one of the council planners who has always been quick to provide (or find) information when I ask for it whether it was in his department or not. Council need more dedicated people like Aaron.
Darren from Wise Drafting for his great ideas and input early on in the ideas to plans phase.
David and Glenn from RCI Engineering for their quick turn around on the engineering work.
Daniel and Jason at Footersville for quickly supplying all the engineering for the roof framing.
David and Lee from BlueScope Lysaght for the quickest ever quote for steel roofing materials.
Our parents/inlaws for listening to all the ideas and helping give outside perspective. Sometimes you can bury yourself so far into an idea it’s hard to see flaws in your thinking.
And finally to Tany from Pocius and Associates for putting all the bits and pieces together and making sense of it all for us.

From here it’s now time to drag out all of those sketch books and note pads and get all of the ideas and drawings collected over the last 14 months into order so when we have that actual final piece of paper approving the build we can swing it all into action.

Optimism is increasing

Monday, August 2nd, 2010

The certification process
First volley back from the private certifier gave me a list of 13 items that needed more clarification, validation or that were just wrong. I’ve just resubmitted the revised items and we are confident we now have all the pieces of the puzzle, it’s just we need to fit it altogether.

The certifier is being very thorough and that is exactly what we are paying him to be. I’m still amazed that this far into the journey, with all we have learnt, we could still have so much that needed to be tweaked. If we were to do this again I would retain the certifier from the start as the length of this process is in chasing everyone else for the corrections to the work that have done for us.

The self sufficiency quest
I have enough data now to know just what conditions we will be facing in terms of getting power generated. Using that data and manufacturers’ specifications I now know we will need a single 2kW turbine backed up with 1kW of solar panels. This really does not change the overall costs of setting all this up it just better spreads the opportunity to make power.

Ironically what I have seen from the data collected is there are days with not enough wind and not enough sun to produce enough power. However these are roughly 1:100 day events so they are isolated, though it seems these days are the calm before the barometer swings heralding the changing of weather patterns. Our intended battery backup will provide ample power for these odd days.

Planning the build
Having the confidence now that we are on the right track and approval is going to be sooner rather than later I’ve spent a lot of hours working out just what it is I need to manufacture to be able to make the mould system to build the house. Using graph paper to map out the block outline of the house I have been able to work out how we are going to stage the build and what mould components will be needed for each.

Essentially I have tweaked the sections to be built so were have the maximum use from an absolute minimum pool of parts. Less parts of course makes the system cheaper and quicker to build and leaves us with less to transport or store.

Testing the theory
Every council has guidelines allowing you to build an outbuilding of certain size without needing to seek planning or development permission and in our council this building size is 15 square metres. We will build a shed of this size that will later become the storage area for the self sufficient power components. The roof of this shed will become the base for the solar panel array so the shed will be orientated to make maximum use of solar north so the panels we have will be generating the maximum power a fixed array can.

The shed will be built on strip footings with a floating concrete raft as a floor. I’ve used the engineering specs from the house to specify the footing depth and width and also the lintel details for the window and door. Since this is a trial run, we’ll be using exactly the same principles and design spec to make this shed so it will be perfect opportunity to test ALL of the components of the house. The roof will also provide enough rain to supply a 5000 litre tank while the shed itself will be a perfect storage area to keep us and tools out of the weather.

This building we will start on as soon as we have the building consent for the house.

Self sufficiency revisited

Friday, May 28th, 2010

At the back of my mind for the past few months has been the niggling doubt over connecting to mains power. We do have a 19Kv line running through the property, with a power pole approximately 140 metres from where the house is to be sited. So the cost involved to get power to the house is “affordable” while still being a fair whack of cash. For arguments sake lets round the figure to $20k for the transformer and then undergrounding some enormous cables from the pole to the house, all grunt labour supplied by myself of course.

Water pumps
Being dependent on rain water means we also need to pressurise the delivery of it. One option here is to use a header tank and that will do away with the two 400W (400 watts) pressure pumps we would have needed. 800W of power using pumps may not sound like a big power draw, but I’ll explain later on why we are better off not having them if we intend being off grid for power.

Lighting
I spent some time yesterday looking at the quickly evolving LED “globe” technology which is a major advance in lighting efficiency similar to the step from incandescents to compact flourescents. Doing the sums on our proposed lighting for the house we would need to run about 1000W worth of these and this we can do over a 12 volt network rather than conventional 240 volt.

I’ve done some preliminary costings on a small 200W 12 volt turbine and 4 deep cycle SLA batteries at under $1k to forever eliminate the power bills for lighting. My scrap paper calculations reckon on this setup being able to power lights for 3 days (typical use) should no wind blow. With the average windspeed we have the system should be able to power entirely off the turbine with the batteries there for backup on the very rare occasion it is calm or when the turbine needs to be taken out of service for maintenance.

Appliances
Since we’ll be using gas to cook, wood to heat and solar for hot water –  the 3 largest users of electricity in electric only houses – I crunched a few figures on exactly what we would need to produce and store in terms of renewable energy to power the house. 

We have the typical “always on” items such as fridge and chest freezer. Then we have the usual appliances that are used in short bursts each day such as the kettle, toaster, microwave and tv. We are now keeping a logbook of the usage of each of these short burst use appliances to see just how much power they are likely to use.

The limitations
It is very important that one thing is kept in mind here, and that is the PEAK POWER LOAD. One thing about being off grid is you are limited in the amount of power you can draw at one time. All of these systems run inverters that take DC power (directly from the turbines or the battery banks) and turn it into 240 volt AC for use inside the house.

Typically a 3kW (3000 watts) 12 volt  inverter will cost $2800 and will let you draw up to 6kW for 1-2 minutes at a time. If we were to consistently exceed 3kW of power draw (done as simply as having the  kettle and toaster running together) we would need to add another expensive inverter to share the load. Constantly abusing the inverter by exceeding the rated power will of course shorten its working life.

By simply using the kettle, then using the toaster we can avoid the above situation but it means being very aware of what we have running and when. Removing the water pumps as discussed above will also help keep down that peak power load. All these systems require a power dump when power excess to needs is generated and we’ll divert that to a pump to fill the header tank. The header tank will overflow back to the storage tanks so it can pump away all day if it needs to.

Wind versus solar
Dollar for dollar wind will deliver more power and by a large margin. Considering the wind blows 24/7 and the sun gives 10-12 useful hours a day for solar energy that fact should be a no brainer. A 1kW turbine will set you back less than $5 000 where a solar array of the same capacity would cost you $14 000. The turbine of course is useable 24 hours a day and the solar array only half of that.

In terms of storage the turbines always being capable of delivering power means we need a much smaller storage solution. A 12 volt battery bank can set you back $3 000 for a low draw scenario such as wind power then go all the way up to $22 000 for high draw capacity as needed for solar.

Calculating what we need
Unfortunately the renewable energy market is focused on city based installations and of course they are only interested in solar installs. Similarly government rebates in the past have been heavily focused on solar since most of our population by default lives in densely populated areas. This means finding any sort of online calculator to work out the specs for a system has proved impossible so far.

Piecing together information has led me to believe we can get a wind powered off grid setup consisting of:

  • a small battery bank,
  • three 1kW turbines (1 spare for redundancy in case of breakdown, maintenance or future expansion),
  • three charge controllers to send power to the batteries,
  • an inverter to deliver the 240 volts required to the house
  • a small diesel generator for battery conditioning and power top up should it be needed
  • a dedicated shed for storage of chargers, inverter and batteries.
  • a seperate 12 volt system for lighting only

for under $25 000. While this initially is more expensive than connecting to the grid, that $5000 gap should be recouped within 5 years at todays power prices.