The earth sift I made works as it was intended. BUT…. it is time consuming and it does take a toll on the body having to bang the sieve screen to get dirt to fall through it. At this time of the year the clays in the soil are also activated and you end up with a “sloppy” rock wobbling around on top of the screen.
Trommels are an industrial machine that are basically a perforated rotating drum on a slight angle. The material to be sifted is dumped in the higher end, the drum rotates with anything smaller than the screen passing through it as it tumbles with the larger particles passing through the lower end and into a spoil pile (or as in mining into a crusher).
So here is the simple outline of how I made a trommel to make my job of sifting soil for the walls easier.
First job was to secure a cement mixer, a quick tour through eBay and their localised subsidiary Gumtree found a suitable cement mixer for sale for $180. I used this as a base since a trommel needs a slow and controlled spin and a cement mixer already has the gearing in place to achieve this. Important note is that mixer had a bowl that was bolted to the gearing. The first thumb below is the mixer I bought. Second thumbs shows bolts cracked and the bowl removed to expose the gearing.
I picked up an ex food 44 gallon drum for $15 and an elcheapo 5.5HP honda knock off engine for $177 from Paramount Browns. The drum I sat in a square frame on casters and used the momentum of the grinder to cut a 100mm lip into the lid and then separate the drum into hoops, roughly a third of the drum per section as in the third thumb.
Also in the third thumb is the most difficult part by far – getting the 25mm galvanised wire sheet ($42 from Senturion Steel) to roll. That took several ratchet straps and a lot of swearing to roll it back on itself. I’ll leave that strapped up until the frame of the drum is complete and then I will unleash it and trim the excess.
Last thumb in this group shows the new axle for the trommel, it’s a very large 1&1/8 x 10 inch high tensile bolt which also happened to be very expensive at $38.


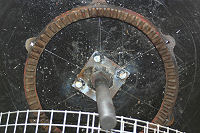
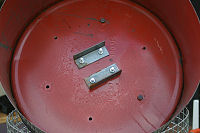
First thumb in this group shows how the gearing works in the mixer. Second thumb shows the axle and gearing in place. The bolt was welded to a 5mm plate with a hole drilled into each corner of it. The most thinking of the job involved working out how to centre the axle in the base of the drum.
I did this by subtracting the diameter of the gear ring from the diameter of the drum, halved the result then used a ruler to mark that measurement in as many places as possible around the rim of the drum. From there I positioned the gearing ring and marked the bolt holes. Once the holes were drilled I scratched a line between opposing sides and that gave me the centre of the drum. Since there are six holes and the bolt head is hexagonal, simply lining up the “corners” of the bolt head with the scratched lines centred the axle assembly perfectly. Holes were drilled, bolts welded to the plate and internally the bolts were secured using a small piece of angle to spread some of the load as shown in thumb 3.


All up this gadget will come in under $500 and since the mixer bowl will be able to be restored I’ll be able to sell it once the project is finished as either a mixer, a trommel or both.


