And here it is
Monday, October 29th, 2012
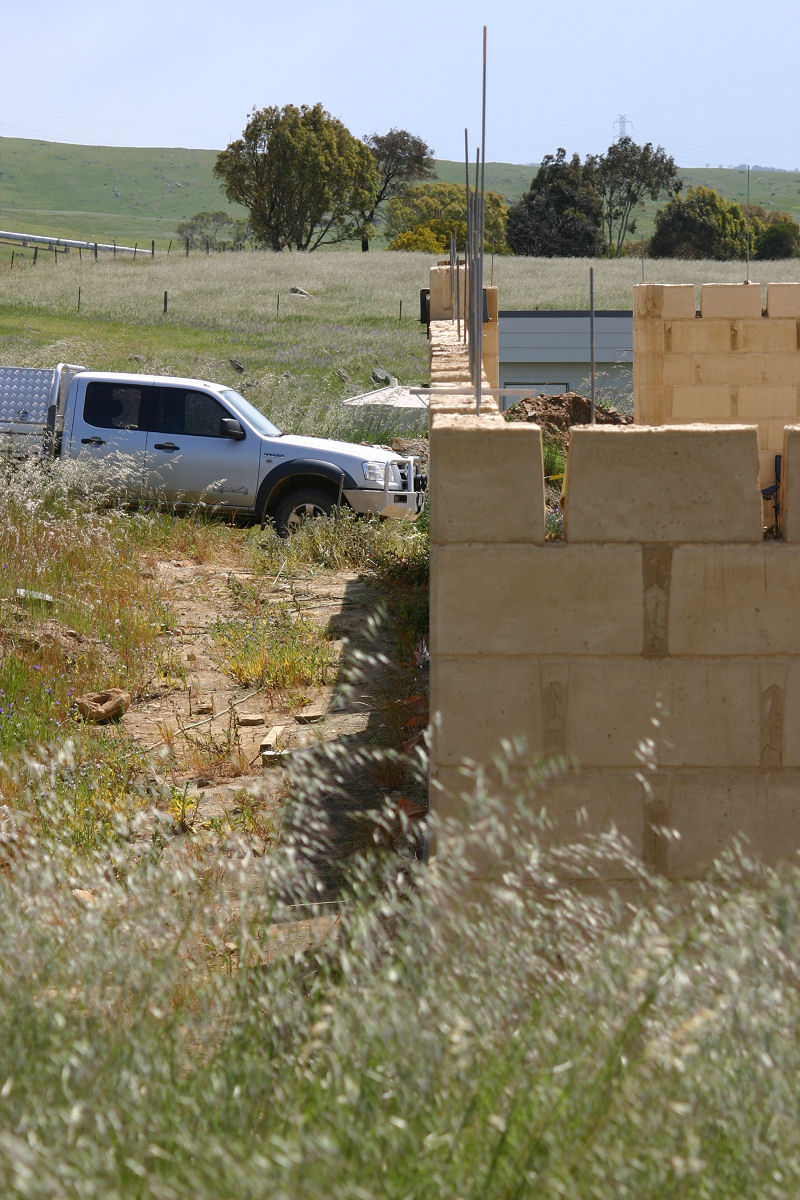
The last of the blocks for the external walls has been set and poured.


It’s great to have the true hard graft out of the way before the heat of summer kicks in. Now that it is completed lockup should be achieved before New Year. 2013 for those asking which one….
Special thank you to my father-in-law Roger who decided to take on the tough task of running the trommel and keeping the dirt supplies up for me. That was without doubt the dirtiest job on site and certainly the most taxing on the body.
Many thanks to my Dad for time spent grabbing odds and sods for me and helping where and when he was able to on site.
Thanks to Elise for prepared meals ready to take up to the block and keeping things organised and moving along at home.
Finally a big thank you to my Mum for looking after our son and making the time spent by Elise and myself possible.
Bianco for white cement – $690.81
Senturion Steel for galvanised steel for framing fixing to threaded rods – $228.80
Adelaide Rural and Salvage for recycled jarah and kauri for windows and doors – $976
Total project spend is now at $298,040.26
House only is now $84,087.76
Cost per square metre is now $291.97
Once all the sections are at that final layer there is one tedious job that will need to be completed – levelling all sections of the wall. I have a rotary laser to do this with and essentially I will find the lowest point then carve a 100mm channel into the remaining sections until there is a level plane for the top plate (90x45mm) to sit.
The 25 holes for the verandah pads will be dug shortly and the concrete will need to be mixed, poured and levelled and given 4 weeks to fully cure before we can start fixing the stirrups to these pads for the verandah poles.
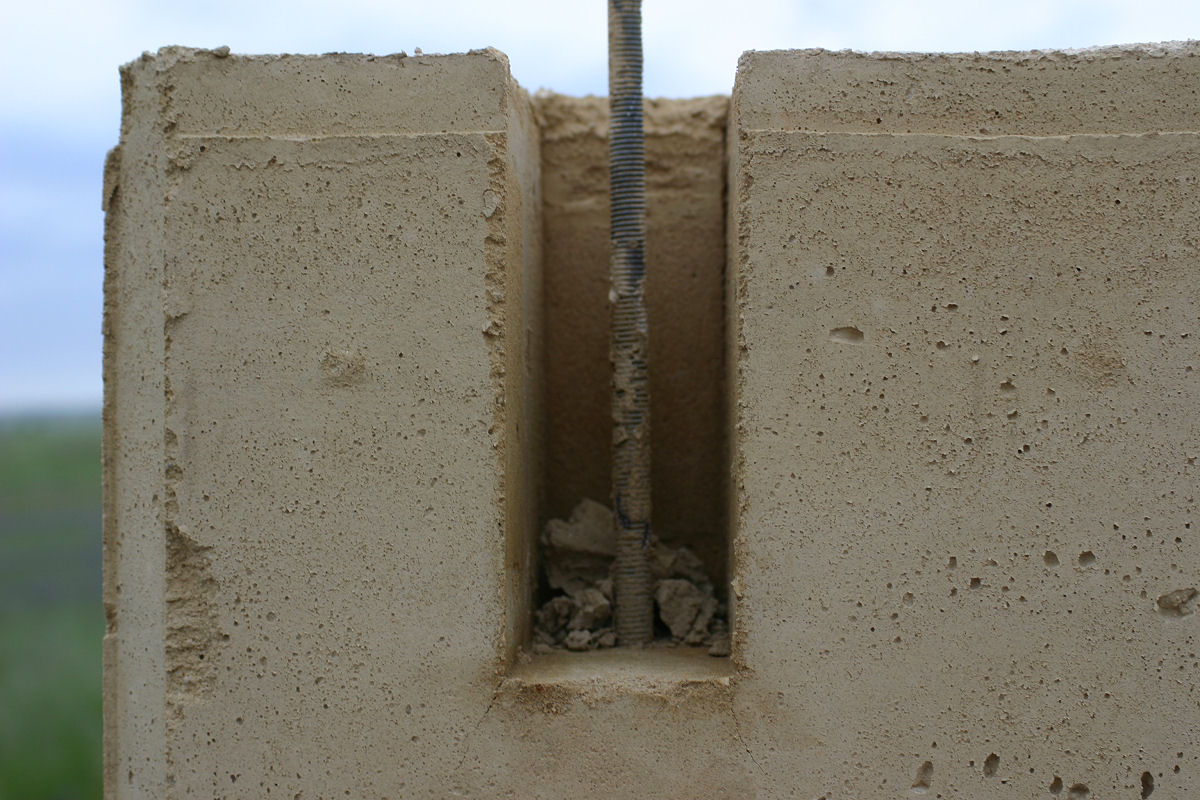
Once this concrete has been poured the remaining gaps between the blocks will be filled with a section of threaded rod bent at 90 degrees to both protrude from the wall and up through where the top plate will sit. This will be the fixing point for the 3/4 return verandah. I’ve left this step until after the wall plate levelling is complete so we are not mixing, pouring and then paring away more earthen concrete than we need to.
From there the verandah will be built to the house as the clearance between the eaves and verandah will preclude a drill being used to fix off the verandah roof sheets.
Our first real tradie since the plumber will then be employed to assist and oversee building and cladding of the roof and the internal wall frames. All of this work is pencilled for completion by New Year.
We’re past 90% now and the next few days will see the worst of the back breaking work completed.


The three pics above are a close up panorama of the house from the top of the drive. The tallest of these is at the finished height of 9 blocks.


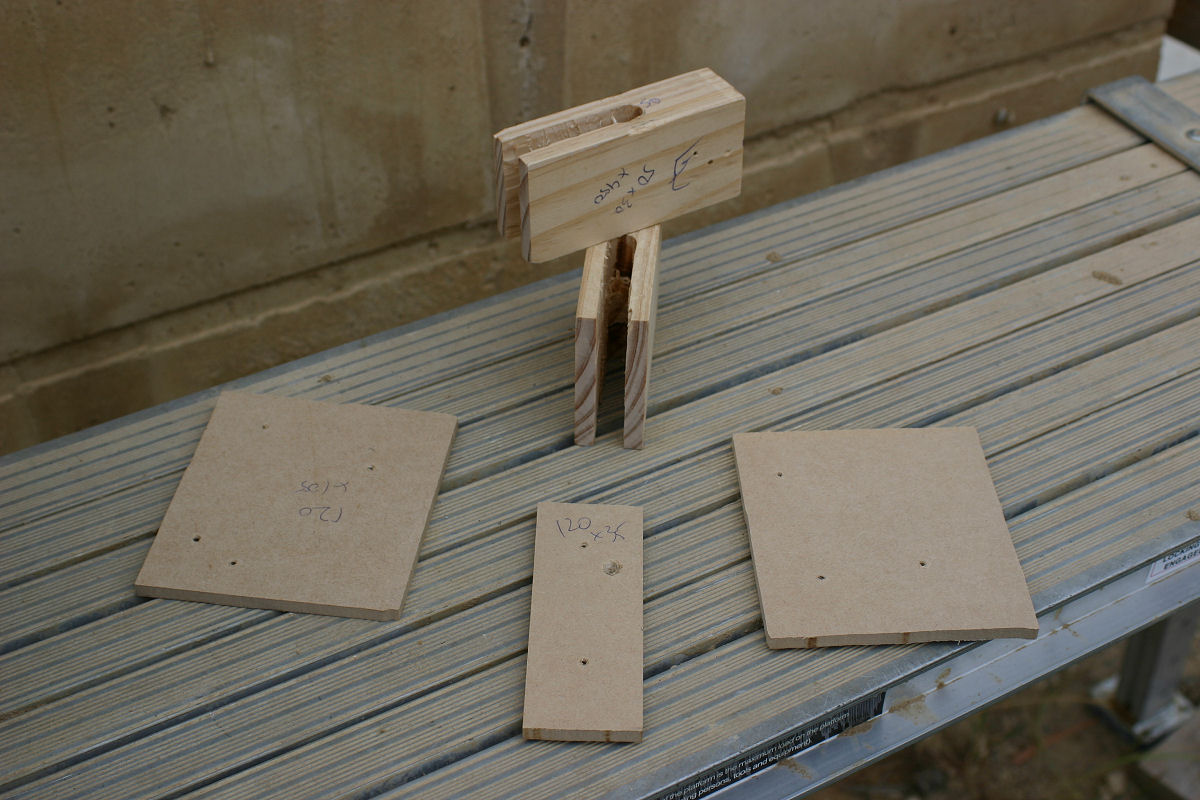
Pic 4 above is from the front gate. Pic 5 shows the crane with the boom balance point now moved to extend its’ reach. A simple crate with rock acts as ballast, if we need to lift anything over about 60kg then we add more ballast to balance the crane. Pic 6 is the method of forming the lintel voids in the wall I devised. This shot shows the machined wood internals and the simple MDF sheeting externals.


Pic 7 is the insert ready to go into the mix. I fix them together with common sticky tape which holds together nicely and allows for simply cutting the tape as in Pic 8 to allow the internal wood to be removed. The MDF is then simply pulled inwards of the remaining void and we’re left with a nice clean resting point for the lintel as in Pic 9
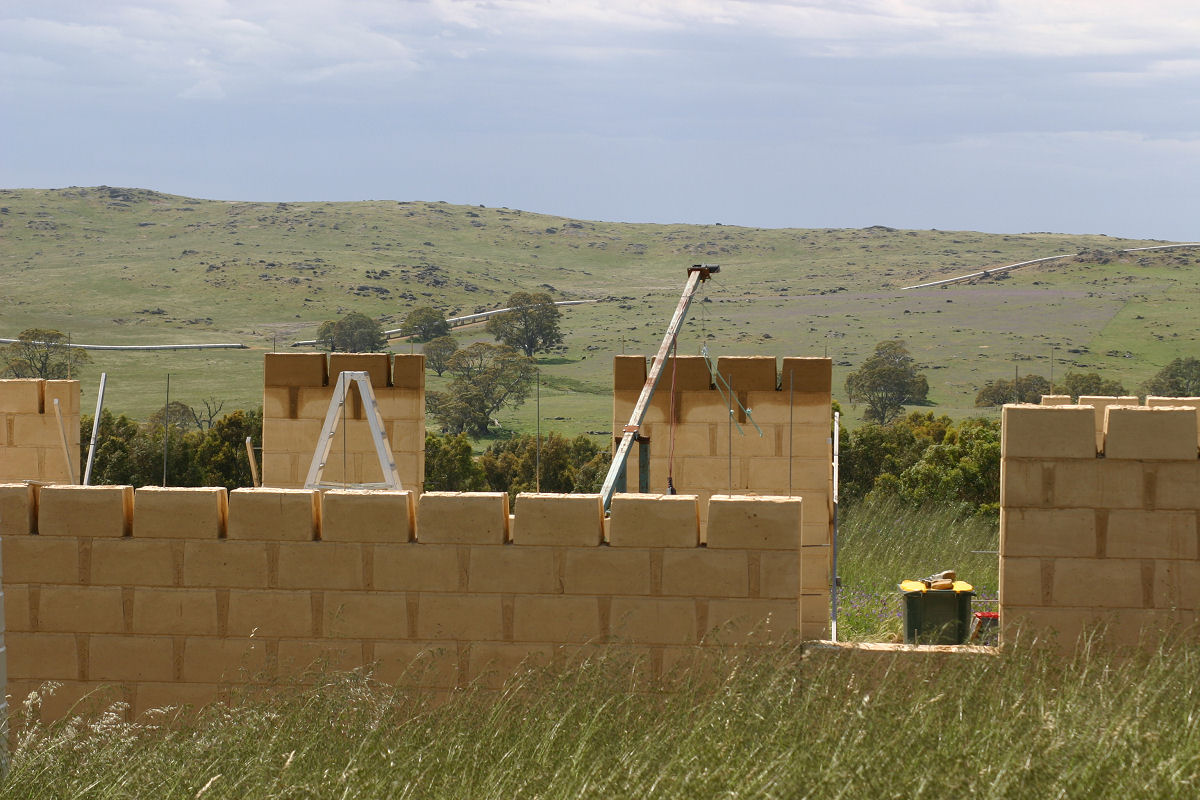


Pic 10 shows the reach the crane now has to be able to lift molds into place to complete the ninth layer. In the foreground there are walls at level 7 on the left and finished height on the right. I’ve been trying to maximise the components I have to be able to set and pour maximum blocks for a days’ work which means not everything is done sequentially.
Pic 11 shows the foreground “skinny walls” at level 8 with 2 of the columns in the back ground at level 9. Pic 12 is looking down the back wall and shows the slightest of deviations from a perfectly straight wall. That deviation is over 30 metres and I’m quite happy we got it as straight as it is. Pic 13 is the front columns of the house and again, almost perfectly straight over the 30 metres. You can also see in that shot where we’ve used the imbeded threaded rods to fix “X” supports to to brace the walls. There have been several storm events where neighbours have recorded 90kph+ winds and the braces have held the walls very well under those stresses.


Pics 13, 14 and 15 are again comparisons over time of the same corner as the building develops.
I have spent most of October back on the block, working towards finishing the walls by the end of this month. The good news is it looks like we’ll finally make a deadline with 4 honest days’ work left to complete the ninth level of the external blocks.
Here are a few pic updates of what’s happening around the place.
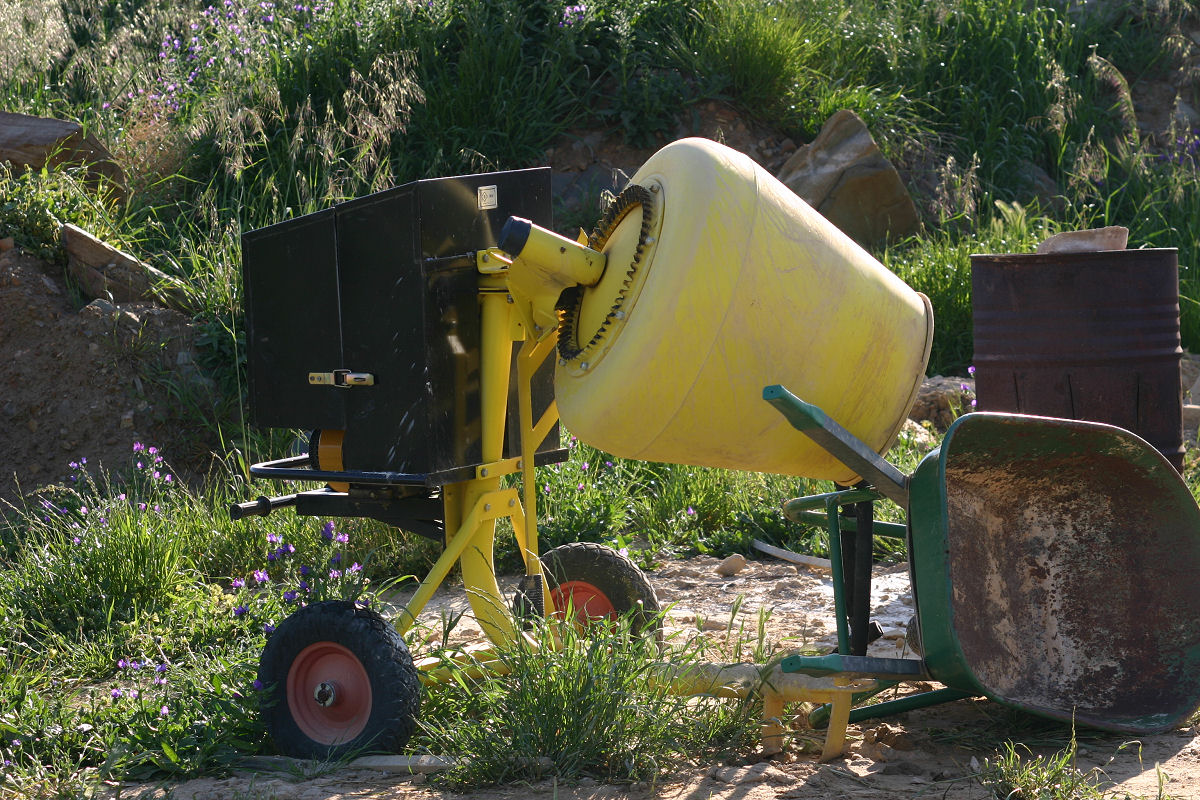

Pic 1 above is “Tweety” the mixer. It is a beast of a machine and has been working even harder than the mixer we killed before. Pic 2 shows the only real damage almost 5 months of cold miserable weather has caused to the existing walls with the blocks becoming “face blown”. Not a great deal to us since we’re more interested in a house with character than one which is clinical perfection. Pic 3 is where the first of the aquaponics sheds will go, once the roof is on the house.
Pic 4 below shows the woodlot planted around 3 years ago. Many of these gums are now over 2 metres tall and should be ready to start harvesting in another 2-3 years.