June 26th, 2013


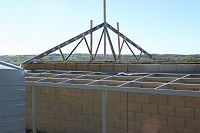
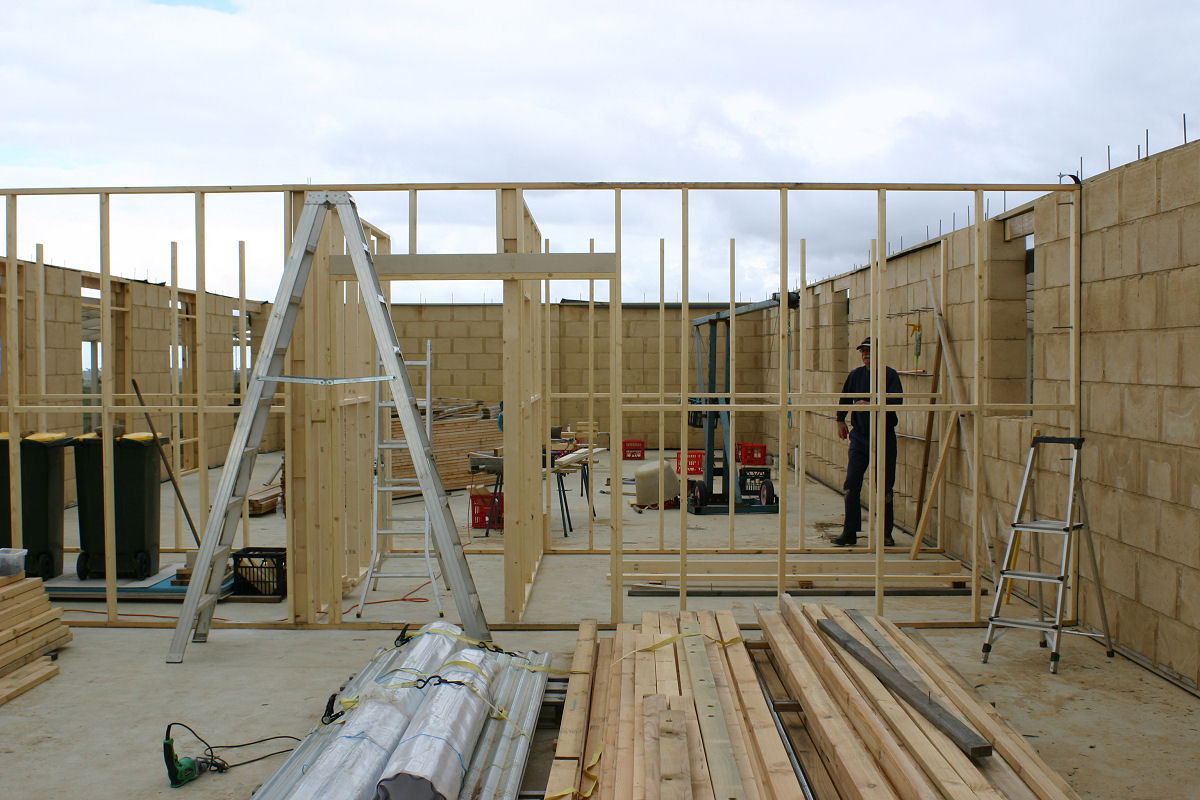
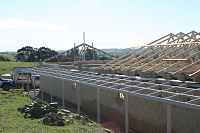
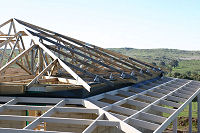
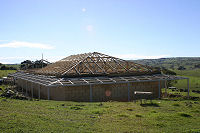
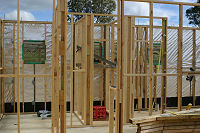
Finally our mud box is now looking like a house with the roof structure giving it the missing perspective of height. Pic 1 above is the first truss raised, one of the girder trusses with the main jack truss that forms the hip end towering over it. Pic 2 is the completed hip end and the first few full trusses fixed off and in position.
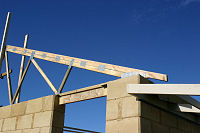
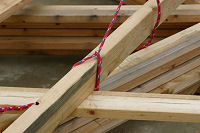
We have a friend with 40+ years building experience helping us get this right and his wisdom and years of knowledge meant a slow and cautious start. Once the hip end was completed we were able to confirm we had built a square house and it was back to the gable end of the roof to begin running trusses that form the large 10×9 metre common area (lounge, dining and kitchen). Pic 3 is the heaviest of the trusses lifted and fixed off. This truss supports the overhanging eave of the gable and has almost twice the wood of the other trusses.


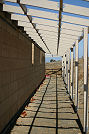
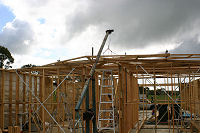
Pic 2 above is our building friend dangling off a ladder as he fixes off that heavy truss. Pic 3 is looking down the roof line.

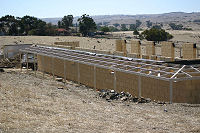
Pics 1 and 2 show some of the detail in that hip end.Pic 3 above is a landscape of the roof structure
Pic above shows the extra timber in that raking truss.
Posted in Building Progress | No Comments »
June 19th, 2013
It’s been a while since there have been any pics to show progress of the build, and this time around there are plenty.


Above in Pic 1 we have the completed verandah frame looking down the west wall of the house. That’s almost 32 metres in length. Pic 2 is one of 400 or so joist hangers and many thousands of nails used to build the verandah. We’ve used these so the verandah will have no roost areas for the multitude of small birds around the place to congregate and leave their droppings on the paths below.
In previous posts I have mentioned threaded rods being moulded into the last row of block voids to allow the verandah to be fixed off. Pic 3 shows how this was acheived. The other end of these rods passes through the 90×45 top plate the trusses are fixed to giving us (I hope) a really solid fixing point. Pic 4 above and Pic 5 below gives a perspective of how it all wraps around the house.


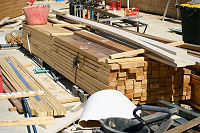
The 2 pics above are shots of the truss and timber piles which needed to be moved in order to build the internal wall frames.


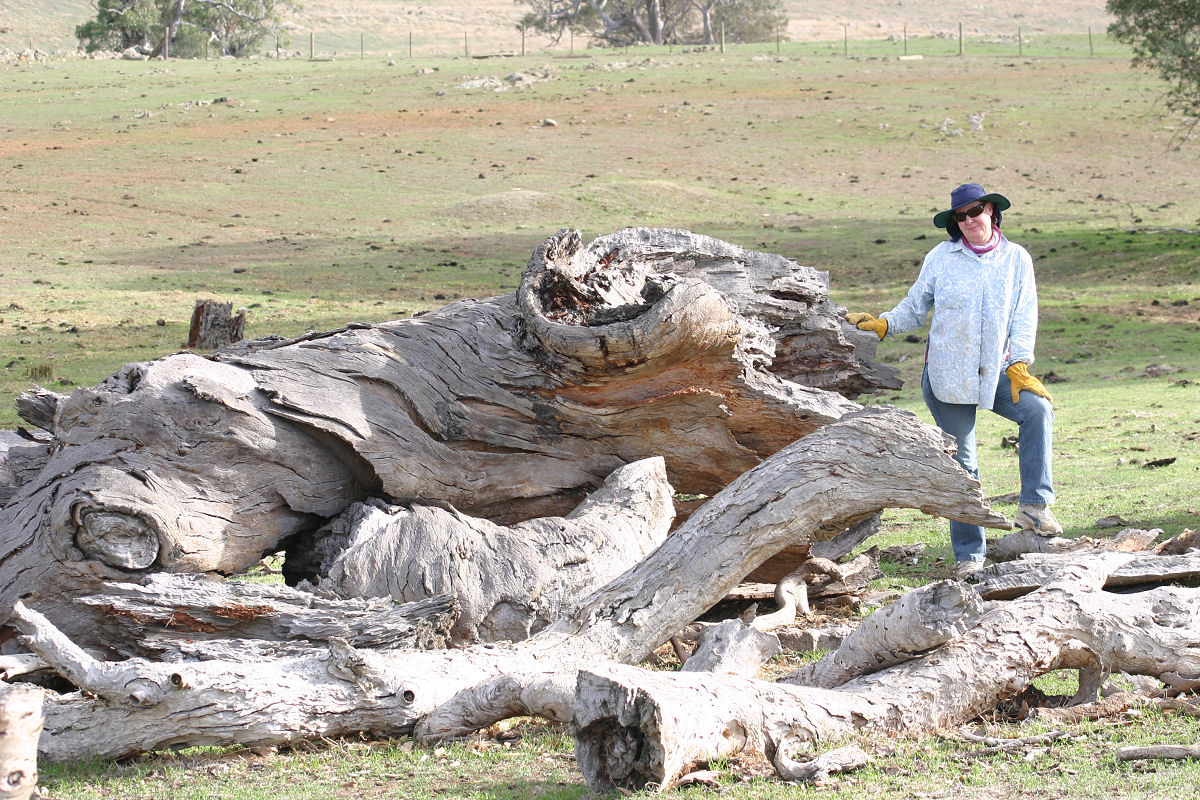
One of the luxuries of living in the country is the freedom of using wood to heat your home without the prohibitive cost of having to buy it nor having to worry about smoking the neighbours out of theirs on cold still nights. Pic 1 above is the “firewood” tree wih Elise standing next to it. Pic 2 is the view from this tree back to the house and Pic 3 is the fallen limb from this tree that we are using to keep warm as the winter cold bites. There woukd be 2 years worth of wood from this fallen limb alone, and we have 20-25 gums of this size and their dropped limbs spread around the property giving us a great source of well seasoned wood until our plantings are at harvest size in 5 or so years. Pic 4 is where we cross the creek on the property to access the firewood tree.


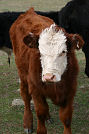
Above we have cows mobbing the ute. Over summer they are fed off the back of a ute and will come stampeding from all over the property when they hear a diesel vehicle clunking around in the paddocks. Next pic is one of the lovely picnic spots over the permanent waterholes spread along the creek. More cows mobbing the ute in Pic 3 and last up one of the latest arrivals on the farm.


And finally, some internal wall framing. Pic 1 and 2 are of the wall dividing the living and sleeping areas. The wide opening with the lintel above it will house a cavity sliding door. Pic 3 is my ever reliable helper, father in law Roger, looking pleased with the days effort. Pic 4 is the beginning of the tedious task of framing the veneer walls of the wet area to suit the threaded rods set into the wall way back when we will still mixing and pouring mud.


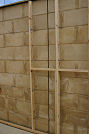
There is some 20 metres of this walling and Pic 1 and 2 above will give you an idea of how we used those rods to fix the veneer wall to the mud wall. Having the ability to adjust the position of the bracket with a spanner means these walls were beautifully straight and aligned with very little real effort. Rods were cut after both nuts were forcibly tightened to ensure the walls would stay put and then cold galv painted to slow the onset of any rusting. Once all those frames were made to suit the rods int he wall, the whole lot was pulled down and the reflective foil you see in Pic 3 and 4 was fixed to the back, frames fit back to where they came from then all 100 angle brackets were fixed and the walls adjusted to straight and plumb using the nuts spun onto the threaded rods..


Pic 1 above is Roger working on the WIR/shower room/ensuite toilet area. Once we had this completed the trusses required moving and they were moved onto the two completed wall frames in Pic 2 above. Pic 3 is my trusty boom crane being used for that purpose. At full reach it was able to stack the trusses 10 high above the framed walls. Pic 4 is of the improvised slings used and the strong back, a 90×45 lump of timber, that kept the trusses from deflecting to the point of failure as they were lifted.


Finally we have the other fixing points of the strong back, simple friction clamps were plenty strong enough to hold all in place as the trusses were manouvered into place. Pics 2,3 and 4 are of the aerial antics once the trusses were lifted to maximum height.
Posted in Building Progress | No Comments »
April 28th, 2013
Apologies for a lack of updates, we’ve temporarily moved and I’m restricted to a mobile internet solution that I reckon dial-up would beat hands down. Plenty of photos will follow, once I can get decent upload speed.
Bianco for cement and hardware for verandah – $174.93
Adelaide Rural Salvage for jarah/kauri for the windows and doors – $190
Bunnings for polycarb sheet and hardware for the verandah – $763.12
Evans and Clarke auctions for marine handy panels, RRP $4800 – $1652.40
Evans and Clarke auctions for jarah floorboards, RRP $2550 – $756.40
United Fasteners for verandah fixing hardware – $140.55
Total project spend is now at $322,727.21
House only is now $108,774.71
Cost per square metre is now $377.69
Posted in Project Costs | No Comments »
February 1st, 2013
This update sees us crashing through the $100k mark for the house build.
Bianco for white and grey cements – $242.07
Bunnings for Taubmans Endure for verandah colour coats – $154
Footersville for trusses and roofing timbers – $8061.70
Woodside landscape supplies for sand and metal – $587.20
Mitre 10 for hook hinges for windows – $153.40
Landmark Mt Pleasant for grey cement – $137.70
Total project spend is now at $319,049.81
House only is now $105,097.31
Cost per square metre is now $364.92
Posted in Project Costs | No Comments »
February 1st, 2013
I’ve quit my job and I’m now driving our son from Adelaide to Birdwood daily for school. While he’s in school I get about 5.5 hours out on the block to get some work done and then it’s back to school, pick him up and back to town.
We have secured a rental in Birdwood that is available from Feb 9 and we’ll be moving the essentials to this place ASAP so we can avoid putting the boy through the daily 100km round trip. He’s been a trooper with it so far but I know he’d rather be playing than strapped into his car seat for at least an hour a day.
I’ve been able to use the time he’s in school well for the 3 days it was possible to work this week, managing to mix and pour around 3 cubic metres of concrete into the footing pads for the verandah. I’m utilising the trade racks on the ute and taking safe amounts of timber and other materials with us each trip so the entirety of the verandah is just about sitting there ready to be built. By safe I mean we are driving through Chain of Ponds daily and having a raised centre of gravity, even just a hundred kilos or so, is enough to make the trip uncomfortable with the ute pitching and rolling around even at the much slower pace being travelled at keep the boy comfortable.
Before I can start with the verandah I need to finish anchoring the threaded rods into the wall so the verandah wall plate can be bolted to this. That should be finished by next weekend and then I’m thinking a week to cut to size and assemble the verandah. While I’m anchoring the rods I’ve also been levelling the rest of the top plate and only need to cut and fit the lintels before the top plate can be bolted into place.
The roof trusses are on site along with the kilometres of timber used for battens and purlins and it took me 2 full days to move all that from the driveway onto the safety of the slab. We should get them up and the majority of the braced wall framework into place inside another week, at which time I will order the roof cladding and insulation which has a 3 day lead time.
Once we are at lock up I’ll be back to work and plugging away at the build before and after work and on weekends. It’s also time for a couple of tradies to come in and get the electrical and plumbing out of the way for us.
The dream, she is a getting closer.
Posted in Building Progress | No Comments »
January 20th, 2013
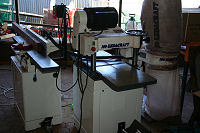
After getting quotes of $16 000 plus for the doors and windows in Western Red Cedar we made the decision to make our own, out of recycled Jarrah and Kauri hardwood of course. Part of deciding to make our own doors and windows included acquiring the proper machinery to get the job done with the least amount of fuss. A trip to Leda Machinery late last year was made to purchase the toys below.
Pic 1 is a planer/jointer which lets you square up the old timbers. Most if not all of these timbers were rough cut and little to no attempt was made to make them square. I use the planer/jointer to make 2 side square to each other. This is done by planing the wider surface then holding that newly planed surface flat against the back stop and planing down the thinner surface until the timber is squared.
Then the thicknesser in Pic 2 can be used to shave down the opposing sides and leaves us with nicely squared timber. Since few of these timbers are even the same dimensions, the thicknesser is then used to shave down the timbers until they are identical in width and depth. Pic 3 shows how I have them setup in a working environment, the dust extractor to the right of the thicknesser is absolutely necessary and you’d be mad to consider using any of these tools without one. These machines quickly make mounds of shavings and very fine dust which is almost as irritating as fibreglass. The lower bag of the extractor holds around 60 litres of debris and we have filled the 240 litre green waste bin almost twice just making the frames for the windows and doors.


There is a real feel of history passing through your hands when you get to work with recycled timbers. I’ve dug out quite a few “square” hand forged nails from the timber which indicates some of these lengths I am working with could be a hundred or more years old. We have purchased all of the timber so far from Adelaide Rural and Salvage and we’ve bought many metres of timber from them for projects in the past. Highly recommended for both their willingness to help and knowledge of the timbers they are dealing with.
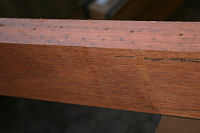
Pic 4 below is a typical piece of jarrah out of the pile. Pics 5 & 6 show just what beauty is hiding below the dirt and grime encrusted outer layer of these timbers. The wood is just exquisite in both colour and grain.


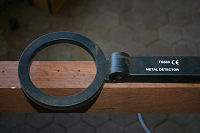
Once timbers are cut and dimensioned they are allocated to a job set, hence the designators such as “T1” and “B3” and the like as in pic 7 below. Pic 8 is a simple lesson in mathematics. Set of blades for planer/jointer = $40, for the thicknesser $70. The metal detector was cheap insurance at only $60.

Posted in Building Progress | No Comments »
January 14th, 2013
With the silly season comes a lot of inevitable downtime as we take time out to appreciate family and friends and celebrate the season. In between Xmas, New Year, birth of a nephew, and 3 birthdays over the past 2 weeks I’ve managed to get 2 colour coats on the verandah timbers, process about half of the wood for the window frames and continue collecting odds and ends for the house.
Roofing trusses have been delayed until the 25th of January, we’ll be looking to have the house at lockup around mid February.
Picked up some very nice ceramic disc tapware and mixers at the auctions this week.
Evans & Clarke auctions for all kitchen, laundry, bathroom and shower tapware and spouts, RRP $2250 – $810.01
Total project spend is now at $309,337.65
House only is now $95,385.15
Cost per square metre is now $331.20
Posted in Project Costs | No Comments »
December 28th, 2012
Evans & Clarke auctions for a drop in bath, RRP $699 – $126.23
Evans & Clarke auctions for R3.5 insulation, 300 sqm total, RRP $1890 – $929.48
eBay and various sellers for MC4 connectors, solar cable and MC4 connector crimping kit – $311.25
Bianco for odds and sods – $86.35
Footersville, deposit on roof trusses – $962.64
Total project spend is now at $308,501.73
House only is now $94,549.23
Cost per square metre is now $328.30
Posted in Project Costs | No Comments »
December 28th, 2012
Occasionally you just need to tell people when you are happy with how a company makes products and conducts business. I would like to take a moment to tell those of you considering an off grid setup about Coleman Air
I ordered a substantial amount of equipment from them (enough for the house plus a separate setup for the aquaponics shed) and it was here within a week of them sending it out to me via DHL. It was extremely well packed with the volume of each box roughly twice the contents, the contents neatly and securely wrapped in bubble wrap and then completely immersed in a protective cocoon of shredded paper. The boxes took an obvious beating during the trip and the contents were completely unharmed.
I was also keen to have a look at the quality of the gear, as they do assemble the equipment themselves. All the work is very neat and tidy and gives the impression it was crafted rather than just slapped together.
If you’re going to go off grid I encourage you to take a look at what they have to offer, especially the charge controllers. Just remember, they are US based and you will be liable for import duties and taxes if you exceed $1000 as a private importer. Our duties and taxes were roughly 15% of the invoiced amount.
Posted in Uncategorized | No Comments »
December 23rd, 2012
And again it is the time of year where I say with/without the religious beliefs you do/do not follow, happy and safe silly season to you all.
The roof will not be on before the end of the year as the trusses are not able to be delivered before January 14 next year. The roof iron has been slated for delivery the week after that.
I have the electrical control gear and the panels for the house safely stored and waiting to be rigged up. Timber for the windows and doors is being shaped and will soon be ready for glass.
Lots is happening, just doesn’t look like anything is getting done…. still it is that season.
Posted in Uncategorized | No Comments »